Disclaimer:

Some of the products used on my blog may have been provided by the vendor mentioned in my posts

Tuesday, 27 December 2011

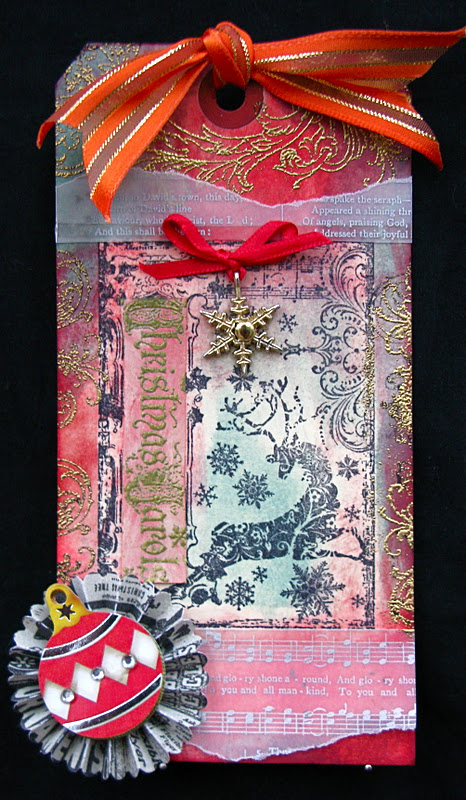
Happy Christmas Everyone! Shimmer, Glimmer and Glitz


Rather belated but better late than never. Over at Gingers some of us have put together Christmas cards to wish followers A Merry Christmas. I would like to extend this to all fellow bloggers a very Merry Christmas and here is to a great New Year of crafting. God bless all of you!

This is an Elusive Image stamp which I stamped onto glassine and then coloured with Sakura Glittery pens and a water brushed the colours so that they reacted more as paints.

i am entering it into the Stampotique challenge which will be the very last week to enter with another stamp company stamp. In fact I think it is the first week I have ever entered without using a Stampotique stamp. Well I had to join in once when I was allowed.

Friday, 16 December 2011

Snow Hugs


Today I have made a simple card from the Rogue Redhead designed stamps. These glorious hearts come from The Snow Hugs plate. At the Rogue Redhead shop there are some amazing deals to be had on their stamp plates. Why not take a look. You will be surprised how many stamps you can get for very little.

Wednesday, 14 December 2011

Wax with Gingersnaps


This is a piece I started when I had my fab girls weekend with Sue and Sioux. I wanted to create a canvas white toned Christmasy piece that looked cold and wintery. The star was a stencil which I filled with Terra Texture paint. When dry I painted it and the canvas with pale cool colours. I sprinkled clear glitter onto the star so it would stick whilst the paint was drying. I then stamped onto tissue paper and applied this onto the canvas.

When I came home I wanted the colours to be even softer so applied a thin layer of wax over some of the images to soften them. I also applied the Merry Christmas by stamping onto tissue paper and adhering with wax. I have also found this glorious ultra thick gesso which I spread over sequin waste to give it more dimension and texture.

There are some other varied creations by the design team over on Gingersnaps. Please take a look.

Thursday, 8 December 2011

Non Traditional Christmas Card week with Stampotique 43


Stampotique's challenge this time was to create a Christmas card with no Red or Green So here is my version. 

I used Beach Washed paper that has a darker core and ran it through a Cuttlebug embossing folder to bring this out more. Sanded the top and then rubbed an embossing pad over the high points and added clear glitter embossing powder. This gives it a subtle sparkle. The snowman was stamped and again embossed with clear glitter powder. He too has a very subtle sparkle. I gave the snowman a candy cane which I did not colour with red and mounted the tag onto this brown and blue backing paper which I think really sets it off.  I love the pale blue dots on the paper as they remind me of snow falling or snowballs.

Tuesday, 6 December 2011

T!m's 12 Tags 2011 (2 - 5)


Tag 5

I am starting T!m's 12 tags by blogging Tag 5 as I am so proud of my cheat! I did not have any reflection stamps but I did have some Christmas cards that looked like the word background. So I simple stuck one to the tag and cut around.

This next bit is the bit I am proud of. How to incorporate the plastic front to look similar. I took some acetate and ran it through a snowflake embossing folder. Not a Tim one as they tend to be deeper cut and thought it may cut through? But as I haven't tried it, it may not? Then I took a really old almost dried out Stazon in black and rubbed it gently over the high points. Stuck it over the tag. Fab. Not only distressed looking but with a snowflake texture as well.

I did have the right die for the wreath so I took 2 different green core card and cut the leaves. Rubbed them with sand paper and layered and adhered. I rather like the two tones of green. Finally added a wish embellishment as well as the pearls and ribbons and it was done.


Tag 4

The main difference with this tag to T!m's is that I cut the snowman out of thick brown card which worked great as it did not curl at all. The second difference was that I used Picket Fence Crackle paint rather that Rock Candy Crackle paint. I was making this tag with my friends Sue and Sioux,  during a wonderful girls weekend, (you can read more about it on Sioux blog), who both used the correct Rock Candy paint. I must admit I preferred the finish for the Snowman of the Picket Fence as it was beautifully matt and felt more like snow.


Tag 3

As Tag 4 was the first of the tags I made when we came to do Tag 3 together we all decided to improvise since as we did not have the proper stamp. I decided to use a similar technique as for the Snowman to incorporate the cut out Joy word to add to the tag for a little different definition. I backed this with copper foil. We all mixed and match word stamps to create something that was along the lines of T!m's tag using different colour for the words.


Tag 2

Now finally this lush Reindeer. I just love this calico reindeer and would never have thought of doing this, but I love it. Bit of improvisation on this tag but not much. Added a "Joy" charm embellishment as the calico reindeer brought me such joy. 

I will also link this post to Grungy Monday and join in the fun there!

Tuesday, 29 November 2011

T J Blog Hop with the Rogue Redheads


Welcome to Stop #8 on the joint Rogue Redhead and Technique Junkies Blog Hop!  We are all having loads of fun with the new Technique Junkies' 3D and Fun Folds CD!

The Technique Junkies team has joined us to showcase the numerous great techniques on this new CD.  As you may know, 
has been publishing rubber stamping technique tutorials since 2002. The 3D and Fun Folds CD contains 70 step-by-step technique tutorials in PDF format ñ perfect dimensions, perfect directions and great pictures for every step. 
Visit http://www.techniquejunkies.com/ for more details about the CD and the Technique Junkie Newsletter.

A fantastic group of design team members from both Rogue Redhead Designs and the Technique Junkie Newsletter, have helped put together this fabulous Blog Hop to kick off the 3D and Fun Folds CD.  Not only will the talented Technique Junkies team be hopping with the Rogue Crew today, they started hopping yesterday with Classy Cards N' Such and will be hopping again all the way through Friday one day each with PaperTemptress, Mark's Finest Papers, and Sweet n' Sassy Stamps.  Check the  

After visiting me, you can head off to see Joanne Wardle at Made By Joanne
for your next stop.


This is a rather fun double sliding card and the template is available to Technique Junkies blog subscribers
As you will see by joining in the blog hop their site is full of creative ideas and new ways to expand your crafting skills. Why not take a look.

This is the double slide card once slid! It is a combined blog hop with Rouge Redhead stamps so I have taken the opportunity to use a stamp from the Relish Reading plate and the Floriculture plate. I thought the two inner stamps went well together. There are some great bundles available at the moment of the Rogue Redhead website shop. Do take a look and grab one!


Remember you do not want to miss any stops along the way so please leave me a comment if you are playing.
Good Luck and enjoy!

If you get lost along the way, here's the whole list of hop stops for your convenience.


4.  Beverly G., Rogue Crew

5.Jean Franks Beck, Rogue Crew


7.   Jane Bosi 

8. Laura Liddell, Rogue Crew

9 Joanne Wardle, Rogue Crew


11.Stephanie Severin, Rogue Crew

12.   Sharon Briss, Chief Rogue


Have fun along the way!

On Saturday, December 3, Pat from the Technique Junkie Newsletter will announce the winners from each company. Be sure to hop along on each day! There will be
FIVE WINNERS

On Monday, December 5th, Pat will announce
ONE LUCKY WINNER with a GRAND PRIZE
with a bundle of prizes from all of the participating businesses.

If you have been following along already you should have come from 

If you are only starting here, please head back to the 
 and go from there.

If not, your next stop is the fantastic

You won't want to miss any stops along the way 
in order to win you will need to comment on everyoneís blog 
AND Pat Huntoon's blog. 
There will be an additional chance to win by playing along in her Blog Hop!

Red, Yellow and Brown with Gingersnaps

I have just realized I have not blogged this yet!


Gingersnaps have a new colour challenge which is to use red, yellow and brown. Anyone who follows my blog will have noticed I have been making Christmas Tags in anticipation of the TH 12 tags for a while now. And here is just another one.

I started with some brown patterned paper stuck to a tag. Added red embossing to make it shine a give dimension. Created a layered poinsettia from Studio 490 Christmas set. A bit of music for the carols at Christmas. A wonderful die cut deer with branches for antlers wearing a stylish Christmas wreath adorned with a bell. A Seasons Greeting wish and a touch of holly, all finished with a sparkly red bow.

Saturday, 26 November 2011

Christmas Ornament Exchange with Gingersnaps


Just look at these!

They are just awesome. I cannot tell you how thrilled I have been with this Christmas Ornament Exchange. The quality off the swaps and the love that has been put into them just makes me tingle. 
They are certainly going to have pride of place on my tree this year.

The two above are by Petra Brendensen and Suze Bain

Ali, founder femme at Gingersnaps is the main host and I was the UK host.

I cannot wait to see what the US cousins have created. 
I cannot image they will be as wonderful as these but I do hope they are.
What talent there is out there.
Thank you all for joining in and sharing.

I think this has been the best exchange that I have taken part in so far.
Lets hope we can keep it up!
Just awesome! 

Do drop by their blogs and let them know.

These two are by Emma Sims and Kerry Hickton


These are the ones I sent:


Friday, 25 November 2011

Grungy Monday Week 28: Thanksgiving Box


This week the challenge is to use Tim's Pumpkin challenge. You can see it here:


I decided to create a hexagon box and then cover it with The Ranger silver metal which has a sticky back and so easy to use in this way.


First I cut out a card template for the box. Then I chose an embossing folder to run the metal through to create texture. I love this random circle folder. I then positioned the card over the metal and drew around the template. When cut out it was so easy to apply with the sticky background. I did cut it out slightly larger and then trimmed back.


I really liked the plain silver look and did not want to colour the box. I even decided not to run a dark stazon ink over the high points to add depth. I just liked it plain simple so the flower would stand out even more.

The flowers were punched out of metal sheet, run through a flowery embossing folder and then coloured with Alcohol Inks as Tim's video.  I really like the effect of the coloured flower against the silver box. The metal is lovely to shape too, to create dimension. Enjoyed this make.

It reminded me of a water lily floating on a pond and the circle embossing folder looks like rings in water after a pebble is thrown in.

Stampsmith: New Website


Stampsmith have a great new website which is so easy to navigate. It also includes some great tutorials and samples of work using their stamp range as well as tips and projects.
 I was very lucky to have been given this stamp sheet to use. Caravan by Jack Sherman. 

I just love his drawings and find it such a delight to use his designs. They are so fun to colour in.


The other great thing about this stamp sheet is the images are duplicated by the second image is facing the other way. Perfect for creating something like this. I thought I would be doing a load of kiss stamping, which I was not looking forward too, but to my delight it was not necessary. The image was already there.


I started by stamping in black and then clear embossing. This gives the line some edge and it is fantastically easy to colour in.


I used Promarkers to colour in, but the card needs to be thick enough or glossy, or something so the colours do not seep through to the back. I ended up using glossy card which seemed to work well.
I created little open carriages just big enough on 4 of them to carry a tea light. I have photographed it on the mantle piece above the fireplace. It does look rather fun at night. It would work well on a windowsill as the scale here may be better. But I guess I should say "Do not leave candles unattended they may be a fire risk" Especially if your window lets in a small draught.


HERE is a link to another creation I made with Stampsmith stamps and Jack Sherman's drawings.


I f you are interested there are lots more photos of the Carousel, which actually rotates, if you follow the link just above.

Tuesday, 22 November 2011

Sketch with Stampotique


This is my Sketch entry for the current Stampotique challenge. I have used various punches and created a half moon for Moon Girl to perch on. Added gems around the moon and to highlight Wish. Wish is part of a Best wishes stamp where I have only used part of it. 

I have just popped over to Stampotique to pick up the link and the card just before this is so similar, even the colours,  it is spooky! Must be great minds in tune again.

Asian Theme with Dragon's Dream Tag it on.


This is my Asian Themed tag for this weeks Dragon's Dream Tag it on. The edges were run around with a glue pen and then gold embossing added to give it a frame.

Monday, 21 November 2011

Silhouettes with Less is more: Week 42


I love this stamp which I think is an Outlines design. I have had it for several years now and love to use it a Christmas. I simply stamped it onto black card, embossed with Silver Pearl powder and mounted it onto white card that had been run through a Cuttlebug folder.
So this is my contribution to the LIM challenge, Silhouettes, week 42.

Sunday, 20 November 2011

Grungy Monday 27


This is my contribution to Grungy Monday 27.

The background was created using the method shown by Tim Holtz: 

I them stamped onto glassine with Stazon and a Tim Holtz stamp. I then torn the paper by using a ruler to rip by and attached it over the tag. I made a fir cone from the Tim Holtz die. I found this quite tricky to do. If anyone has any clever tips on how to construct these please let me know. It took my quite a while to get it so I was pleased with it.

I finally added a charm and a big Christmasy ribbon.

Friday, 18 November 2011

Livestock Challenge with Gingersnaps


There is a new challenge just started over on Gingersnaps and the theme is Livestock. I remembered these free stamps I have had for ages and actually found them. I followed a tutorial idea from the Gingersnaps site on making inchies: Masterboard Technique by Alison Manning, who in my opinion is the master of inchies.

 I do not know whether other people in the UK have had problems finding an inch square punch. All the ones I have found are an inch across the diagonal and not by the edges? If anyone has solved this problem please let me know.

So the animals have been cut by hand and layered onto a 2 inch (by the diagonal) plain square punch and then layered onto a wavy edge punch. And a bit of twine added, a vital instant repair item for farms.

I was craving a wonderful stamp by Creative Individuals which has some wonderful chickens on it but I just had to let that craving go.

Saturday, 12 November 2011

Grungy Monday 26


This is my Grungy Monday contribution following Tim Holtz's technique which can be seen here:


The products I used were a TH stamp, Distress inks, Rosette die, Gold embossing, music vellum, ribbons, charm and bauble sticker.


Tuesday, 8 November 2011

Dragon's Dream: Tag it on: Mr Magorium's Wonder Emporium


A half hour play today before work allowed me to put this together for Dragon's Dream: Tag it on for their challenge of Mr Magorium's Wonder Emporium. So pleased I was able to meet the deadline and not forget it was Tuesday. LOL
Another great challenge.

Sunday, 6 November 2011

Grungy Monday 25


I was in New Zealand when my mother died. We had just arrived after being in Australia for 4 weeks. Heading towards the Bay of Islands stopping at a campsite near a natural hot spa by the coast.

The phone call bringing the news in the middle of the night which surprisingly only woke me. Our first night in a new and beautiful country.

Creeping out the camper bus with only my nightdress on and a fleece jacket I managed to grab noiselessly on my way out. Sitting on the sea wall by the camper looking at the clear night filled with stars which look so different in another hemisphere. The sky nearly filling my whole view. No light pollution. Just astoundingly large and bright. Funny I cannot now remember what the moon was doing? What phase? But the wonder and the sadness I felt and the smallness we are in the universe yet the ability to fill so many people with so much love. I sat there and thought about so many things. About being a mother, about the miracle of life growing within you, about giving birth and the magic of breast feeding and nourishing those babes you love so completely. Did my mother feel the same about her babies? How honoured I felt to be a woman and to be given these gifts in life. About unconditional love.

I remember getting so cold sitting there on that wall. I wanted to get a blanket but I did not want to wake anyone, to disturb this sad but peaceful and special space I needed to have. I did not want their comfort at that time. I needed the universe, the stars and to swim in the immenseness of it all, to let my thoughts wander and ponder and reflect. But how cold I was.

There were shooting stars travelling across the sky from time to time. How magical that was. No need to say what symbolism I conjured in my mind seeing this phenomena.

I think I must have taken paper and pen out with me when I left the van? Or did I creep back in to get it knowing it was on the table just inside the door. If I did why did I not pick up a blanket? Not possible  without creating disturbance?  I do not now know.

I began to write my thoughts sitting on that wall below the vast sky of stars and the sea lapping on the shore.  I found it cathartic and it gave what I was experiencing shape. My feelings and thoughts were so intense. I think after filling numerous pages with thoughts I then just wanted a few lines to sum up the emotion I was feeling. And these words on the tag are what I came up with.

It was quiet the day my Mother died.
Sadness is quiet.
I thought about the sunrise for me 
and the sunset for her.

By now the first signs of a new day were showing. Once done I crept back into the van and curled up under the covers waiting to feel warm again.

Grungy Monday 25
www.timholtz.com
Distress stains, Distress inks, Embossing folder, Butterfly die, Heart die.

Friday, 4 November 2011

Show a house with Simon Says


This week Simon Says Stamp and Show a House. Well here is mine.
The house stamp is from Paperbag Studios which I stamped onto fabric and paper to create a collage look. I have also used stamps from Stampotique and Paper Artsy, combined these with paper I coloured with Acrylic inks and a sponged sun and some wiggly stitching.

Thursday, 3 November 2011

Altered Poison Bottle with Stampotique


Fly me to the Moon

After much thought this is what I came up with for The Altered Poison Bottle with Stampotique.

My sense of humour is evident again! I know I have used Smile flying before with these wings but really I just love him too much like this not to use him again and felt it was just so apt with Rocket Fuel not to have him taking off to the moon. I did think about calling this "Bermuda Here I Come" but with the trend at the moment to use songs and films as inspiration "Fly me to the Moon"  won out in the end. Hope you enjoy.

Related Posts Plugin for WordPress, Blogger...